The user administration panel allows creating
and editing user and group profiles
as well as areas. Users belong to one or several
different groups. The groups
are defined in WinCC OA
or, in the case of Windows administration, are inherited from
the Windows user administration. A user inherits the rights from
a group or several different groups. A user has to belong to at
least one group. Rights cannot be defined for single users individually.
An arbitrary number of groups can be defined and an arbitrary
number of users can belong to a group. The rights for a group
are defined via different authorization
levels. There are five
predefined default levels and additional levels can be defined.
Areas are
logical or geographical zones of a plant and can be assigned to
different groups. The rights for an area assigned to a group apply
to all users belonging to this group.
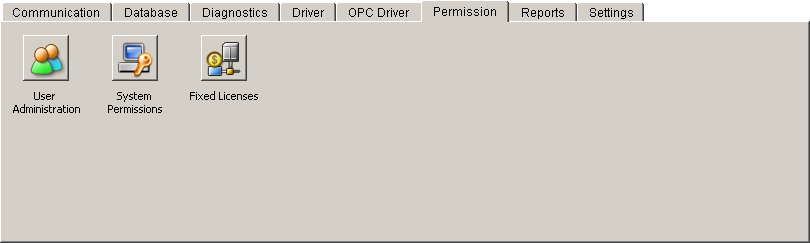
The user administration panel is opened via the
System management by clicking on the User admin. button:
Figure: System management - Authorizations tab
 Note Note
Note that if you do not have the authorization
level 4 you cannot open the System management and PARA panels
and an error message is displayed.
Figure: User administration panel
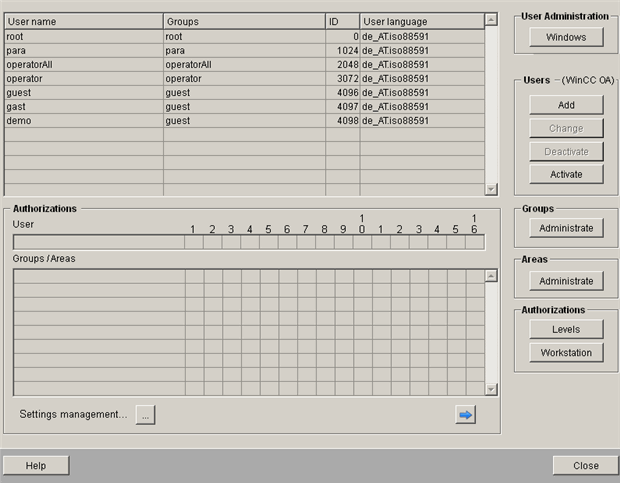
The user administration panel contains three different
areas: first, an area providing details about available logins,
second, the Authorization area and third, on the right hand side,
the area for setting users, groups and areas.
The first area shows table with user specific data,
including User
name, the Groups
an user belongs
to, the user ID
and the
User
language. User name shows the full name
defined for an user. If no full name has been defined, the user
name is presented instead of the full name. The Groups column displays the full
name that was defined for a group. User language shows the default
project language chosen for the user. All activated users are
listed in this table. If you delete (deactivate) an user, the
user disappears from this view. Activated user means that the
user is permitted to use the system. You cannot deactivate the
user root. A double-click on a row opens the User characteristics window
which allows changing the user's properties (see chapter Users
for detailed information on the User characteristics window).
Another click on the row gives more detailed information on the
user in the User
and Groups/Areas
views described further on.
The Authorization
area consists of the User and Groups / Areas tables. The
User
shows the authorization bits for the group the selected
user belongs to. If the bit is set to 0, the user does not have
rights for this authorization level. If the bit is set to 1, the
user has the rights for this level. Note that the view only presents
the information and authorization bits cannot be changed here.
For more information on authorization levels, see chapter Authorization
levels.
The Groups/Areas
table shows the groups and areas the selected user belongs to.
The groups and areas will, however, only be shown if an area is
assigned to a group. The line operatorAll/Tunnel1, for example,
means that the group "operatorAll"
is a member of "Tunnel1"
or in other words that the area "Tunnel1"
is assigned to the group "operatorAll".
For more information on groups and areas, see chapter Groups
and Areas.
Configuration
Management... Opens the panel Configuration
Management. The panel allows to define user (group) or workstation
specific settings and to use them.
 Allows
viewing the next 16 authorization
levels and bits in
the Authorization
and Groups/Areas
views. Allows
viewing the next 16 authorization
levels and bits in
the Authorization
and Groups/Areas
views.
On the right side of the panel, there are several
buttons that allow performing different actions such as setting
users, groups and areas. The buttons provide the following functions:
User Administration
Windows: Allows changing the user administration.
You can select between WinCC OA and Windows
user administration. (The Windows user administration option is
visible in the figure User administration panel
(on this page) since
the WinCC OA
user administration has been selected at the moment. If you have
selected the Windows user administration, the WinCC OA
user administration option is visible). See chapter Windows
user administration for more information.
 Caution Caution
If you change from WinCC OA
user administration to Windows user administration, all WinCC OA users are deleted
and the Windows users as well as the Windows user groups the users
belong to, are adopted at the first login! The authorizations
for the user groups , however, have to be defined in WinCC OA.
Note
In a project
coded in UTF-8 the user and group names are converted into
ISO-Format when changing to Windows user administration. If umlauts
(ä,ö,ü) and "ß" are used in user and group names, they
are not displayed correctly in Windows user administration. Therefor
it is recommended to use only characters of the 7-bit-ASCII
character set in user and group names.
Users
Includes
the following buttons:
Add: Allows adding a new user via the
User characteristics window (For more information on
the User characteristics window,
see chapter Users) in the WinCC OA
user administration.
Change: Allows changing the
Full name and Description of an user in the User
characteristics window.
You can also define and change group memberships when using the
WinCC OA user
administration.
Deactivate:
Deactivates the user selected in the list. A deactivated user
cannot use the system.
Activate: Opens the User
activation panel that
allows to activate users. Only activated users can use the system.
The activated users are shown in the first view at the top of
the User activation panel. For
details on the User activation panel, see chapter Users.
Groups
Administrate: Opens the Group administration
window that allows creating, administering and deleting
user groups. Group administration
also allows assigning areas to groups. See chapter Groups
for more information.
Areas
Administrate:
Opens the Area administration
window which allows creating, administering and deleting areas.
See chapter Areas for more information.
Authorizations
includes three buttons:
Levels:
Opens the Authorization levels window which allows creating and
deleting authorization levels. See
chapter Authorization levels for
more information.
Workstations: Opens the Workstation
authorizations panel
which allows defining rights for all user groups or alternatively
for several specific groups. For more information, see chapter
Workstation authorization.
Help: Opens the Online Help.
Close: Closes the panel. |